 (Image via
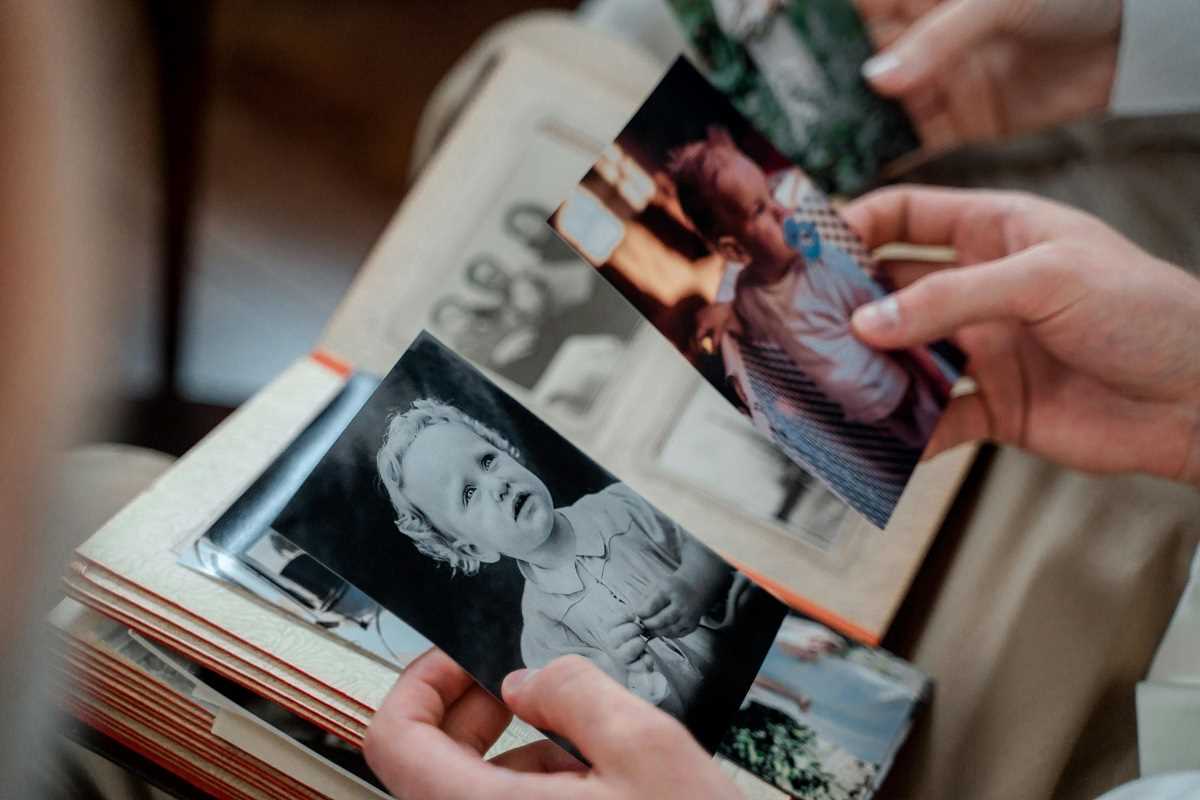
Family photos deserve more than being left in digital storage or tucked away in photo albums. They tell your family’s unique story and can beautifully personalize a home when displayed creatively. From sleek modern designs to fun DIY projects, the possibilities are endless. Whether you want to create a focal point in your living room or add a personal touch to an empty hallway, these ideas will inspire you to showcase your cherished memories in stylish and meaningful ways.
Here are 10 creative ways to display family photos, complete with step-by-step instructions and tips for achieving a polished look.
1. Create a Gallery Wall
A gallery wall is a classic and versatile way to display family photos while adding character to a space.
What You’ll Need:
- A mix of picture frames in various sizes and finishes
- Photo prints
- A measuring tape and level
- Painter’s tape
Steps:
- Choose a wall in your home, such as a hallway, staircase, or above a sofa.
- Lay out your frames on the floor to experiment with the arrangement. Vary sizes and orientations for visual interest.
- Use painter’s tape to mock up the layout on the wall before hammering in nails.
- Hang the photos, ensuring they are evenly spaced and aligned using a level.
Pro Tip: Pick a cohesive color palette for your frames, such as all black, all white, or natural wood, to make the display look polished.
2. String Photo Display with Clips
For a simple and casual display, use string or twine to hang photos.
What You’ll Need:
- Twine or string lights
- Mini clothespins or clips
- Push pins or wall hooks
- Printed photos
Steps:
- Attach the ends of your twine to the wall using push pins or hooks, creating a loose line.
- Carefully clip your photos onto the twine using mini clothespins.
- Arrange the photos so they hang at varying heights.
Pro Tip: Use string lights instead of twine to add a magical glow to your display, making it perfect for a bedroom or teen’s room.
3. DIY Photo Collage Frames
Combine multiple photos in one oversized frame or shadow box for a stunning collage.
What You’ll Need:
- A large frame or shadow box
- Cardstock or a neutral backing
- Double-sided tape or glue
- Photographs in various sizes
Steps:
- Arrange your photos on the cardstock until you’re satisfied with the layout. Add overlap for a layered, scrapbook look.
- Attach the photos to the cardstock using double-sided tape or glue.
- Place the collage inside the frame and hang it in a prominent spot.
Pro Tip: Add small mementos like tickets or dried flowers to your shadow box for a personal touch.
4. Use a Rotating Photo Display
Create a dynamic display with frames or devices that allow you to rotate your photos regularly.
What You’ll Need:
- A digital photo frame or rotating stand
- High-quality photo prints (if using physical frames)
Steps:
- If you’re using a digital frame, upload your photos into a slideshow for a rotating display.
- For traditional photos, place multiple frames on a turntable or lazy Susan to easily rotate through your collection.
Pro Tip: This is perfect for highlighting seasonal memories or special events throughout the year.
5. Repurpose Household Items
Turn everyday objects into unique photo displays.
Ideas:
- Use a vintage ladder as a photo stand. Drape pictures along its rungs using clips or string.
- Attach photos to a corkboard and frame it for a modern pinboard effect.
- Repurpose large clipboards to hang photo prints, creating an industrial-chic vibe.
Pro Tip: Keep an eye out for thrift store finds like old window frames or shutters that can be turned into creative photo displays.
6. Photo Wall Decals
Turn your photos into peel-and-stick wall decals for a seamless look.
What You’ll Need:
- High-quality photo prints
- Adhesive-backed photo paper (available online)
Steps:
- Print your photos on adhesive paper.
- Carefully cut out the images, leaving a narrow border if desired.
- Peel off the backing and stick them to your wall in a custom arrangement.
Pro Tip: This works particularly well for kids’ rooms or playrooms since it’s easy to remove and rearrange photos as they grow.
7. Create a Photo Clock
Blend decor and function by turning your family photos into the numbers of a clock.
What You’ll Need:
- 12 small photo frames
- Wall clock mechanism ($10–$15 online or at craft stores)
- Adhesive strips or hooks
Steps:
- Choose one photo for each hour of the clock.
- Arrange the frames in a circle on your wall, leaving space for the clock hands in the center.
- Install the clock mechanism in the middle and secure the photo frames around it.
Pro Tip: Use photos that highlight different years or milestones, creating a timeline of your family’s growth.
8. Photo Ledges
Install photo ledges to create a stylish and flexible display.
What You’ll Need:
- Floating shelves or picture ledges
- Framed or unframed photo prints
Steps:
- Mount the ledges at a comfortable height, such as just above a console table or bed.
- Arrange your photo frames on the ledge, layering them by size for a casual yet curated look.
- Swap out photos occasionally to refresh the display.
Pro Tip: Add small decorative items like candles or vases to complement your photos on the ledge.
9. Create a Staircase Timeline
Staircases are often overlooked as prime spaces for displaying family memories.
What You’ll Need:
- A mix of photo frames or canvas prints
- A level and measuring tape
Steps:
- Choose photos that tell a story, such as milestones in chronological order.
- Arrange the photos along the staircase wall, following the incline.
- Use a level to ensure the frames are evenly spaced and aligned with each other.
Pro Tip: Stick with frames in the same finish for a cohesive look that flows with your staircase’s decor.
10. Repurpose a Photo Book into Wall Art
Transform your favorite photo album into a wall-mounted display.
What You’ll Need:
- String or thin wire
- Photo book or album
- Clips or small binders
Steps:
- Open your photo book and fan out the pages like a hanging calendar.
- Attach the spine to the wall with string or wire so the pages hang down vertically.
- Rotate through the pages regularly to refresh the images on display.
Pro Tip: Use this idea for showcasing event photos, like weddings or vacations, keeping special moments in view year-round.
Family photos bring warmth, storytelling, and personality into your home. Displaying them creatively allows you to balance functionality with artistry, transforming your memories into a meaningful part of your decor.

.jpg)